Shopping Cart
0 item(s) - R0.00- 3D Printing and Plastic peripherals (8)
- 433Mhz and Lora (9)
-
Amateur Radio (626)
- - Antenna Analyzer (11)
- - APRS (11)
- - ATU (3)
- - CW (1)
- - Digital Modes (9)
- - DMR (4)
- - Echolink (9)
- - Enclosure (13)
- - Eshail-2 (QO-100) (66)
- - GPS (7)
- - iGate (1)
- - Microcontrollers (44)
- - Microphone (1)
- - Power Supply (6)
- - Programming Cable (5)
- - QRP (8)
- - Radio interface (19)
- - Receiver (7)
- - Repeater (4)
- - RF Amplifiers (21)
- - RF Kits (18)
- - RF modules (114)
- - Rotator (1)
- - SDR (71)
- - Spectrum Analyzer (4)
- - SWR (9)
- - Transceiver (57)
- - WSPR (5)
- Antennas and Acc (317)
- Audio and Video (28)
- Bargain Box (1)
- Battery (3)
- Bluetooth (11)
- Cables (35)
- Computer Peripherals (103)
- Connectors (82)
- Data acquisition (1)
- Display (1)
- Electromechanical (25)
- Enclosure (12)
- GPS (5)
- Hardware (1)
- Home Automation (127)
- Inverter (9)
- Liquid (7)
- Lora (8)
- Microcontrollers (120)
- Modbus (3)
- MQTT (14)
- Network Radio (3)
- Networking (8)
- Power (133)
- Power supply (48)
- Radio Interface (14)
- RF Modules (139)
- ROIP (2)
- Satellite (90)
- Security (13)
- Sensor (16)
- Solar (14)
- Test and Measurements (62)
- Tools and Equipment (7)
- VOIP (10)
- Weather (1)
Temperature and Humidity WiFi Module Wireless ESP8266 DHT11 ESP-01/ ESP-01S
Ex Tax: R48.00
Add to Compare
Temperature and Humidity WiFi Module Wireless ESP8266 DHT11 ESP-01/ ESP-01S
Description:
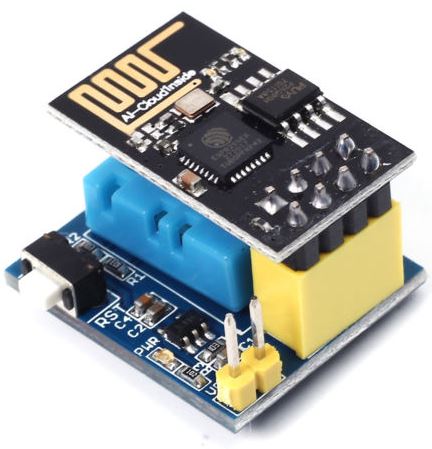
This module uses ESP8266-01/ESP-01S (random hair, ESP-01S or ESP-01) as the master control, and DHT11 as temperature and humidity sensor.
ESP8266 collects the temperature and humidity in the environment and uploads to the server. It supports 3.7v-12V DC power supply (3.7V lithium battery). It can be used as temperature and humidity collection node for smart home or IOT project.
Parameters:
- Host > ESP-01/ESP-01S (random send ESP-01S or ESP-01)
- Temperature and humidity sensors > DHT11
- Operating voltage > DC 3.7V-12V (support 3.7V lithium battery power supply)
- Measuring range > 20-90%RH 0-50 Celsius
- Measuring accuracy >Temperature: +/- 2, humidity +/- 5%RH
- Power supply: 3.7V-12V DC power VCC GND (pin 2.54mm) received.
- Download program to ESP-01S/ESP-01 (random send ESP-01S or ESP-01).
- Insert ESP-01/ESP-01S (Note : randomly sent ESP-01S or ESP-01) into the 2*4 Pin row (in the direction of the arrow).
About Connection:
- TCP Server serial printsinformation
- DHT11 client sends temperature, humidity, and count to the server
- DHT11 add sleep function
- Initializes the add restart function. If the connection fails 10 times, restart the module
Exsample program is avalable here https://www.instructables.com/id/IoT-MCU-Monitoring-Using-the-AskSensors-IoT-Platfo/

You will need this programming unit for the ESP-01 or ESP-01S
- USB Serial converter to program your ESP-01.
- IOT-MCU/ ESP-01-DHT11
- External 3.7V to 5V DC Power supply.
Environment Setup
First, You need install the ESP8266 core to the arduino IDE. Skip this step if you have the ESP8266 already installed.
- Start the Arduino IDE version 1.6.4 or higher
- Go to 'File > Preferences'
- Add the link below to Additional Boards Manager URLs:
- 'http://arduino.esp8266.com/stable/package_esp8266com_index.json'
Go to 'Tools > Boards > Boards Manager'
Search for ESP8266, hit the Install button. Wait until the installation is complete.
Create Your Sensor Modules at AskSensors
- Get an AskSensors account at asksensors.com
- Create a new Sensor with two modules:
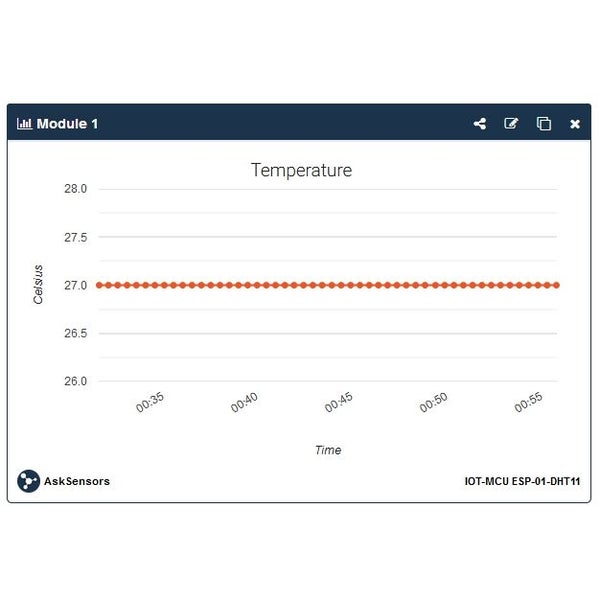
- Module 1: Temperature
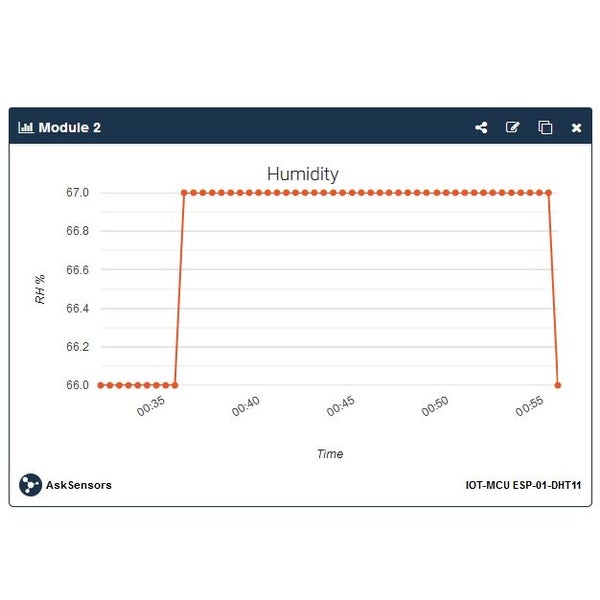
- Module 2: Humidity
Get your Api Key In generated by AskSensors.
You can find tutorials and instructables showing how to get started with the AskSensors IoT platform and setting sensors to collect data using the web browser or the ESP8266 nodeMCU.
Coding
- Install the Adafruit DHT Library.
- Get this example sketch from the AskSensors github page.
- Modify the Wi-Fi SSID and password, the Api Key In and, if needed, the delay between two successive measurements:
Change the following for your Wifi and key
const char* wifi_ssid = "..........";             // SSID
const char* wifi_password = ".........";         // WIFI
const char* apiKeyIn = ".........";      // API KEY IN
delay(25000);     // delay in msec
Now the code is all set. Let's move to the next step to run the software.
Upload the code using Arduino IDE:
- Install the USB serial adapter driver.
- Connect the GPIO_0 to the ground in order to enable the programming mode of ESP8266. There are some USB serial adapter that come with programming switch on it so during upload you have to press the switch. in my case,I have no switch, so I soldered a jumper between the GPIO_0 and the ground of the USB serial adapter.
- Insert the ESP-01 into the USB serial adapter as shown in the first image(1).
- Connect the serial adapter to your computer USB port.
- Open Arduino IDE . You should get 'Port' enabled. if not, select the right port shown for your USB serial adapter (On Arduino software click Tools >> Port).
- Select 'Generic ESP8266 Module' as your board (Go to Tools >> Board >> Generic ESP8266 Module )
- Hit the upload button.wait until the upload is complete.
Before powering up the board:
- Remove the ESP-01 from the USB serial adapter.
- Be sure to remove also the connection between the GPIO_0and the ground to let the ESP-01 starts its firmware normally.
- Insert the ESP-01 into the IOT-MCU connector as shown in the second image(2). Now we are ready to power up the board!
Got Issues ?
Have you get any issues? Please see the next step.
Throubleshooting
Programming the ESP-01 is a little bit hard for beginners. These are some possible errors:
- GPIO_0 is not grounded during the Reset
- The USB Connection with PC is not good.
- The COM port is not correct. If you have more than one port showing, just disconnect the USB serial adapter from the USB port and see what port disappeared. Insert the serial adapter again and verify the new COM port added. Select this port number manually.
- You are not selecting the right Board(Generic ESP8266 Module).
- If you are still having issues, please refer to this instructable.


Power up the board, the ESP8266 will do the following sequence:
- Initialization
- Connect to the WiFi network
- Read temperature and humidity from the DHT11
- Connect and send the measurements to the AskSensors server
- Repeat the two previous steps periodically.
- Login to the AskSensors web site and show graphs of the temperature and humidity modules. You will get your measurements plotted in real time. You can also export the collected data in CSV files.
Well Done!
You have successfully completed our tutorial about monitoring the temperature and humidity with ESP8266 and IOT-MCU board connected to the AskSensors cloud.
Write a review
Your Name:Your Review: Note: HTML is not translated!
Rating: Bad Good
Enter the code in the box below:
Giga Technology © 2024


